Chocolate Chip Cookies
Introduction
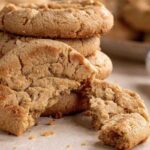
Chocolate chip cookies are one of the most beloved homemade treats in the world. They feature a rich buttery flavor, crisp golden edges, soft and chewy centers, and plenty of melted chocolate in every bite. This detailed recipe is designed to help you create bakery-style chocolate chip cookies with consistent results. Whether you are baking for family, friends, special occasions, or simply satisfying a sweet craving, these cookies deliver wonderful texture and flavor.
This recipe explains every step thoroughly, including ingredient selection, preparation techniques, baking tips, storage methods, and variations. Following these instructions carefully will help ensure perfectly baked cookies every time.
Yield
Makes approximately 24 large cookies or 36 medium cookies.
Preparation Time
20 minutes
Chilling Time
30 minutes to 24 hours (recommended for best flavor)
Baking Time
10 to 14 minutes per batch
Total Time
Approximately 1 hour 15 minutes, including chilling
Ingredients
Dry Ingredients
2¾ cups (345 g) all-purpose flour
1 teaspoon baking soda
1 teaspoon cornstarch
¾ teaspoon salt
Wet Ingredients
1 cup (226 g) unsalted butter, softened but not melted
1 cup (200 g) packed light brown sugar
½ cup (100 g) granulated sugar
2 large eggs, room temperature
2 teaspoons pure vanilla extract
Chocolate
2 cups (340 g) semi-sweet chocolate chips
1 cup (170 g) chopped chocolate chunks (optional)
Optional Finishing Ingredients
Extra chocolate chips for topping
Flaky sea salt for sprinkling
Equipment Needed
Large mixing bowl
Medium mixing bowl
Electric mixer or stand mixer
Rubber spatula
Measuring cups and spoons
Cookie scoop or spoon
Baking sheets
Parchment paper
Cooling rack
Understanding the Ingredients
Flour
All-purpose flour provides the structure of the cookies. Measuring flour correctly is important. Spoon the flour into the measuring cup and level it off with a knife. Scooping directly from the bag can pack the flour too tightly and create dense cookies.
Butter
Butter adds flavor, richness, and tenderness. Softened butter mixes more easily with sugar and helps create a smooth dough.
Brown Sugar
Brown sugar contains molasses, which contributes moisture and chewiness. Using more brown sugar than white sugar helps produce soft cookies.
Granulated Sugar
White sugar contributes sweetness and encourages browning and crisp edges.
Eggs
Eggs bind the ingredients together and provide structure. Room-temperature eggs blend more smoothly into the dough.
Vanilla Extract
Vanilla enhances the overall flavor and complements the chocolate.
Baking Soda
Baking soda helps the cookies spread and rise properly.
Cornstarch
Cornstarch contributes softness and tenderness.
Chocolate Chips
Semi-sweet chocolate chips provide the classic chocolate chip cookie flavor. Combining chips and chunks creates a variety of textures throughout the cookies.
Step 1: Prepare the Dry Ingredients
In a medium bowl, whisk together:
Flour
Baking soda
Cornstarch
Salt
Whisk thoroughly for at least 30 seconds to distribute the ingredients evenly.
Set aside.
Step 2: Cream the Butter and Sugars
In a large mixing bowl, combine:
Softened butter
Brown sugar
Granulated sugar
Using an electric mixer, beat on medium speed for 3 to 5 minutes.
The mixture should become:
Light in color
Fluffy in texture
Smooth and creamy
Proper creaming incorporates air into the dough and improves texture.
Step 3: Add Eggs and Vanilla
Add the eggs one at a time.
Beat well after each addition.
Add the vanilla extract.
Continue mixing until fully incorporated.
Scrape down the sides and bottom of the bowl as needed.
The mixture should appear silky and smooth.
Step 4: Combine Wet and Dry Ingredients
Gradually add the flour mixture to the wet ingredients.
Mix on low speed.
Stop mixing as soon as the flour disappears.
Avoid overmixing because it can develop excess gluten, resulting in tougher cookies.
The dough should be thick and soft.
Step 5: Fold in Chocolate
Using a rubber spatula, gently fold in:
Chocolate chips
Chocolate chunks
Mix until evenly distributed.
Make sure every scoop of dough contains plenty of chocolate.
Step 6: Chill the Dough
Cover the bowl tightly.
Refrigerate for at least 30 minutes.
For the most flavorful cookies, chill for 12 to 24 hours.
Benefits of chilling include:
Better flavor development
Reduced spreading
Thicker cookies
Chewier texture
Improved caramelization during baking
Step 7: Prepare for Baking
Preheat the oven to 350°F (175°C).
Line baking sheets with parchment paper.
Remove the dough from the refrigerator.
Allow it to sit for 5 to 10 minutes if it feels extremely firm.
Step 8: Portion the Dough
Use a cookie scoop or spoon to form dough balls.
For bakery-style cookies, use approximately 3 tablespoons of dough per cookie.
Place cookies about 2 inches apart on the baking sheet.
Press a few extra chocolate chips onto the tops for a more attractive appearance.
Step 9: Bake
Place the baking sheet in the preheated oven.
Bake for 10 to 14 minutes.
The cookies are ready when:
The edges are lightly golden
The centers still look slightly soft
The tops are lightly set
Avoid overbaking.
Cookies continue cooking from residual heat after removal from the oven.
Step 10: Cooling
Remove the baking sheet from the oven.
Allow cookies to rest on the baking sheet for 5 minutes.
Transfer carefully to a cooling rack.
Cool completely before storing.
How to Achieve Bakery-Style Cookies
Use high-quality butter.
Chill the dough thoroughly.
Use a combination of chocolate chips and chopped chocolate.
Bake one tray at a time.
Do not overmix the dough.
Do not overbake.
Use larger portions of dough.
Add chocolate pieces on top before baking.
Common Mistakes and Solutions
Cookies Spread Too Much
Butter was too warm.
Dough was not chilled.
Too little flour was used.
Cookies Are Too Thick
Too much flour was added.
Oven temperature was too low.
Cookies Are Dry
Overbaking occurred.
Too much flour was measured.
Not enough brown sugar was used.
Cookies Are Tough
The dough was overmixed.
Too much flour was added.
Uneven Baking
Cookie sizes varied.
Baking sheets were overcrowded.
Oven temperature was inconsistent.
Flavor Variations
Double Chocolate Chip Cookies
Replace ½ cup flour with cocoa powder.
Add dark chocolate chips.
Nutty Chocolate Chip Cookies
Add 1 cup chopped walnuts.
Or add 1 cup chopped pecans.
Sea Salt Chocolate Chip Cookies
Sprinkle flaky sea salt on top immediately after baking.
White Chocolate Cookies
Replace semi-sweet chips with white chocolate chips.
Triple Chocolate Cookies
Use a combination of:
Milk chocolate chips
Dark chocolate chunks
White chocolate chips
Peanut Butter Chocolate Chip Cookies
Add ½ cup creamy peanut butter to the dough.
Reduce butter slightly to maintain balance.
Storage Instructions
Store cooled cookies in an airtight container.
Room temperature storage:
Up to 5 days
Refrigerator storage:
Up to 10 days
Freezer storage:
Up to 3 months
Place parchment paper between layers to prevent sticking.
Freezing Cookie Dough
Shape dough into balls.
Arrange on a tray.
Freeze until firm.
Transfer to freezer bags.
Store for up to 3 months.
Bake directly from frozen.
Add 1 to 2 minutes to the baking time.
Serving Suggestions
Serve warm with cold milk.
Pair with coffee or tea.
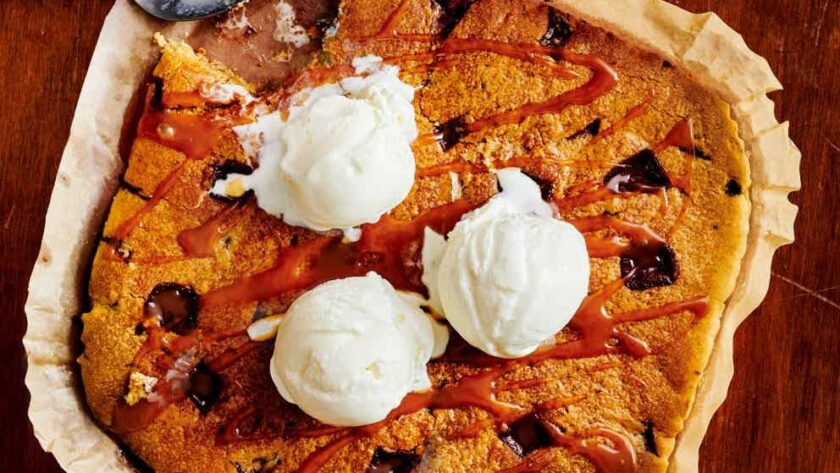
Crumble over vanilla ice cream.
Use for homemade ice cream sandwiches.
Pack in lunch boxes.
Serve on holiday dessert platters.
Final Notes
The secret to exceptional chocolate chip cookies lies in quality ingredients, accurate measurements, proper chilling, and careful baking. Patience during the chilling process greatly improves both flavor and texture. These cookies offer crisp edges, soft centers, rich buttery notes, and generous pockets of melted chocolate, making them ideal for everyday baking as well as special occasions. With practice and attention to detail, this recipe can become a reliable favorite that consistently produces delicious homemade chocolate chip cookies.