 admin1
 Keto Musketeer Candy
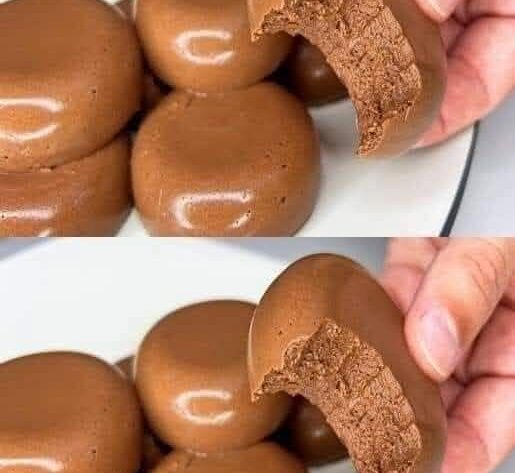
Keto Musketeer Candy is a rich, chocolate-covered treat inspired by the classic soft, fluffy, chocolate-bar-style candy many people remember. This homemade version is designed for a low-carb lifestyle while still giving you the combination of creamy chocolate, airy nougat, and a satisfying chocolate coating.
The texture is soft and fluffy in the center, with a smooth chocolate shell around the outside. It is sweet without relying on traditional granulated sugar, making it a wonderful option when you want something indulgent but are trying to keep the carbohydrate content lower.
This recipe takes a little patience because the candy needs time to set properly. The result, however, is worth the extra effort. Once prepared, the candy can be sliced into small bars or squares and stored in the refrigerator for an easy dessert or sweet snack.
About Keto Musketeer Candy
Traditional candy bars are generally made with substantial amounts of sugar, corn syrup, or other concentrated sweeteners. Those ingredients are responsible for much of the sweetness and chewy texture, but they also make conventional candy unsuitable for many low-carb and ketogenic eating plans.
This homemade version approaches the candy differently.
The chocolate coating provides the familiar deep cocoa flavor, while the center uses a combination of whipped ingredients and a keto-friendly sweetener to create a lighter, softer texture. A small amount of gelatin helps stabilize the center so that it can be cut into pieces without becoming completely liquid.
The exact texture can vary depending on the sweetener used. Some keto sweeteners create a firmer candy, while others produce a softer and creamier result. For the best texture, choose a powdered sweetener that dissolves well.
Ingredients
For the fluffy center:
1/2 cup heavy whipping cream
2 tablespoons unsalted butter
1/3 cup powdered allulose or another keto-friendly powdered sweetener
2 tablespoons unsweetened cocoa powder
1 teaspoon vanilla extract
1/4 teaspoon fine salt
1 teaspoon unflavored gelatin
2 tablespoons cold water
For the chocolate coating:
8 ounces sugar-free dark chocolate or keto-friendly chocolate chips
2 tablespoons coconut oil
1/2 teaspoon vanilla extract
For optional finishing:
A small pinch of flaky sea salt
1 tablespoon finely chopped roasted almonds
1 tablespoon unsweetened shredded coconut
A small amount of finely chopped sugar-free chocolate
Choosing the Sweetener
Sweetener selection makes a noticeable difference in homemade keto candy.
Allulose is particularly useful when you want a smooth texture because it behaves differently from many crystalline sweeteners. It tends to produce less of the cooling sensation that can occur with some sugar alcohols.
Powdered erythritol can also be used, although it may produce a slightly different texture and can sometimes recrystallize as the candy cools.
Monk fruit blends are another possibility, but check the ingredient label carefully because some products contain added sugar or maltodextrin.
Avoid using large amounts of liquid sweetener unless you have tested the recipe because additional liquid can change the consistency of the center.
Preparing the Pan
Begin by preparing the pan before making the candy mixture.
Use an 8-inch square baking pan for relatively thick candy pieces. If you prefer thinner pieces, a slightly larger pan can be used.
Line the pan with parchment paper, leaving some extra parchment hanging over two sides. This will make it much easier to remove the finished candy.
Lightly grease the parchment with butter or a neutral oil.
Set the prepared pan aside while you make the filling.
Preparing the Gelatin
Place the cold water in a small bowl.
Sprinkle the gelatin evenly over the surface of the water.
Do not immediately stir it vigorously. Let the gelatin sit for approximately five minutes so it can absorb the water and bloom.
The mixture should become thick and slightly spongy.
This step is important because properly bloomed gelatin dissolves more evenly later.
Making the Chocolate Cream Base
Place the heavy cream in a small saucepan over low heat.
Add the butter and powdered sweetener.
Warm the mixture gently while stirring.
The goal is not to boil the cream. You simply want the butter to melt and the sweetener to dissolve.
Once the butter has melted, add the cocoa powder.
Whisk slowly until the cocoa has completely incorporated.
Continue heating for another minute or two while stirring constantly.
The mixture should become smooth, glossy, and slightly thicker.
Do not allow it to boil aggressively because overheating the cream can affect the texture.
Remove the saucepan from the heat.
Add the vanilla extract and salt.
Stir thoroughly.
Adding the Gelatin
Add the bloomed gelatin to the warm chocolate mixture.
Stir until the gelatin completely dissolves.
If the gelatin does not dissolve easily, return the saucepan to very low heat for a short period while stirring continuously.
Do not boil the gelatin mixture.
Once everything is smooth, remove it from the heat again.
Allow the mixture to cool slightly.
It should remain warm enough to be fluid but should not be extremely hot.
Creating the Fluffy Texture
The center of this candy should be lighter and airier than an ordinary chocolate fudge.
Pour the slightly cooled chocolate mixture into a mixing bowl.
Using an electric hand mixer or stand mixer, beat the mixture until it becomes lighter and somewhat fluffy.
This may take several minutes.
The mixture will not necessarily become as thick as whipped cream. Instead, you are looking for a softer, aerated chocolate mixture that has increased slightly in volume.
Continue beating until the mixture looks smooth and creamy.
Taste a tiny amount and adjust the sweetness if necessary.
Remember that the chocolate coating will add additional richness, so the center does not need to be extremely sweet.
Filling the Pan
Pour the chocolate center mixture into the prepared parchment-lined pan.
Use a spatula to spread it evenly.
Smooth the surface as much as possible.
If you are adding chopped almonds or another ingredient to the center, sprinkle them over the mixture now and gently press them into the surface.
Place the pan in the refrigerator.
Allow it to chill for at least two hours.
For the best texture, allow it to set for three to four hours.
The center should become firm enough to lift from the pan without collapsing.
Preparing the Chocolate Coating
Once the center has set, prepare the chocolate coating.
Place the sugar-free chocolate and coconut oil in a heatproof bowl.
Melt the chocolate using a double boiler or short microwave intervals.
If using a microwave, heat for approximately 20 seconds at a time and stir thoroughly after every interval.
Continue until the chocolate is almost completely melted.
Stir continuously until the remaining small pieces disappear from the residual heat.
Add the vanilla extract and stir well.
The coconut oil helps make the coating smoother and easier to bite through after refrigeration.
Cutting the Candy
Remove the chilled center from the refrigerator.
Lift it out of the pan using the parchment paper.
Place it on a cutting board.
Use a sharp knife to cut the slab into bars or bite-sized squares.
For cleaner cuts, warm the knife slightly with hot water, dry it thoroughly, and then slice.
Clean the knife between cuts if necessary.
If the center begins to soften too much, return it to the refrigerator for 15 to 20 minutes before continuing.
Coating the Candy
Dip each piece into the melted chocolate.
Use two forks to gently lift the candy from the chocolate.
Allow excess chocolate to drip back into the bowl.
Place each coated piece onto a parchment-lined tray.
If you want a thicker chocolate shell, allow the first coating to set for several minutes and then dip the pieces a second time.
For a lighter coating, one layer is usually sufficient.
If desired, sprinkle a tiny amount of flaky sea salt over the chocolate while it is still wet.
You can also add a few finely chopped roasted almonds.
Do not add too much topping because the classic appeal of this candy comes from the contrast between the soft center and chocolate exterior.
Chilling the Finished Candy
Place the coated candy in the refrigerator.
Allow it to chill for approximately 30 to 45 minutes, or until the chocolate shell is completely firm.
Once set, transfer the candy to an airtight container.
If you prefer a softer texture, let one piece sit at room temperature for several minutes before eating.
The center will become softer as it warms.
How the Texture Should Be
The ideal Keto Musketeer Candy should have several contrasting textures.
The outer chocolate layer should be firm but not extremely hard.
The center should be soft, creamy, and slightly airy.
It should hold its shape when cut but should not feel like a dense piece of fudge.
If your center is too firm, the gelatin may have been excessive or the mixture may have been chilled for too long.
If the center is too soft, it may need additional chilling time.
The type of sweetener can also affect the final texture.
Tips for a Better Candy
Use good-quality unsweetened cocoa powder for the center. Cocoa is one of the main flavor components, so a higher-quality cocoa can make the finished candy taste much richer.
Do not overheat the chocolate. Chocolate can become thick or grainy if it is exposed to excessive heat.
Allow the center to cool slightly before beating it. If it is extremely hot, the mixture will not develop the desired texture.
Use powdered sweetener when possible. Granulated sweetener may leave a gritty texture.
Do not rush the chilling process. The center needs sufficient time to stabilize before you attempt to cut and coat it.
Keep the pieces relatively small. Homemade keto candy is rich, so small squares can be surprisingly satisfying.
Use parchment paper rather than wax paper for the setting stage and chocolate coating.
Making the Candy Less Sweet
If you prefer dark chocolate desserts, reduce the sweetener slightly.
Use a dark sugar-free chocolate with a higher cocoa percentage for the coating.
You can also add a small pinch of salt to emphasize the chocolate flavor.
A little extra vanilla can provide the impression of sweetness without adding significant carbohydrate.
Keep in mind that reducing the sweetener too much can change the texture, particularly if the sweetener contributes bulk to the recipe.
Making the Candy Sweeter
For a sweeter version, increase the powdered sweetener gradually.
Do not add a large amount at once.
Taste the chocolate mixture before placing it in the pan.
Remember that sweetness perception changes when food becomes cold, so a mixture that tastes moderately sweet at room temperature may taste less sweet after refrigeration.
The chocolate coating will also influence the final sweetness.
Adding Peanut Butter
Peanut butter can be incorporated for a peanut-butter chocolate variation.
Use natural peanut butter without added sugar.
A small amount can be swirled into the chocolate center before chilling.
You can also spread a very thin layer of peanut butter over the chilled center before cutting it into pieces.
For a strict keto approach, check the nutrition label and ingredient list of the peanut butter because carbohydrate content varies between brands.
Adding Almond Butter
Almond butter works especially well with dark chocolate.
Use smooth almond butter for the easiest texture.
A small amount can be stirred into the center mixture.
Another option is to drizzle melted almond butter over the top before the final chocolate coating sets.
This creates attractive ribbons of almond flavor throughout the candy.
Coconut Version
Unsweetened coconut can add pleasant texture.
Use finely shredded unsweetened coconut rather than sweetened coconut.
Stir a small amount into the center or sprinkle it over the chocolate coating.
Because coconut contains its own natural sweetness and fat, it can make the candy feel especially rich.
Espresso Chocolate Version
For a stronger chocolate flavor, add a very small amount of instant espresso powder to the cocoa mixture.
Espresso does not necessarily make the candy taste like coffee.
Instead, it can deepen the chocolate flavor.
Start with approximately 1/4 teaspoon.
You can increase the amount slightly if you enjoy a more pronounced coffee flavor.
Mint Chocolate Version
For a mint variation, use a small amount of peppermint extract.
Peppermint extract is concentrated, so use it sparingly.
Add it to the chocolate mixture after removing it from the heat.
Pairing mint with dark sugar-free chocolate creates a candy that tastes similar to a chocolate-mint confection.
Storage
Store the finished candy in an airtight container in the refrigerator.
Place parchment paper between layers if you stack the pieces.
The candy should generally be enjoyed within about one week for the best texture and flavor.
Because the center contains dairy, refrigeration is recommended.
Do not leave the candy sitting at room temperature for extended periods, particularly in a warm environment.
Freezing
This candy can also be frozen.
Arrange the pieces in a single layer on a parchment-lined tray.
Freeze until firm.
Transfer the pieces to a freezer-safe airtight container or freezer bag.
Separate layers with parchment paper.
For the best texture, allow the candy to thaw in the refrigerator rather than directly on the kitchen counter.
The texture may change slightly after freezing, but the chocolate flavor should remain excellent.
Serving Suggestions
Keto Musketeer Candy is delicious on its own, but it can also be served as part of a larger dessert.
Chop a small piece over keto-friendly vanilla ice cream.
Crumble it over whipped cream.
Serve it alongside coffee.
Add small pieces to a dessert platter with nuts and berries.
Chop it finely and use it as a topping for a low-carb cheesecake.
The candy is particularly good when served slightly chilled rather than completely frozen.
Common Problems and Solutions
If the center is too hard, check the amount of gelatin and make sure it was measured accurately. Also allow the candy to sit at room temperature for a few minutes before serving.
If the center is too soft, chill it longer before cutting. If it still does not hold its shape, the mixture may need slightly more gelatin in the next batch.
If the chocolate coating is too thick, add a little more coconut oil and stir until smooth.
If the chocolate coating becomes grainy, it may have been overheated or exposed to moisture.
If the sweetener tastes gritty, use a powdered version or choose a sweetener that dissolves more easily.
If the candy tastes too bitter, increase the sweetener slightly or use a less intense dark chocolate for the coating.
If the candy tastes too sweet, reduce the sweetener in the center and use a darker chocolate coating.
Nutrition Considerations
The nutritional information for homemade keto candy can vary significantly depending on the brands of chocolate, sweetener, cream, and other ingredients used.
Sugar-free chocolate is not automatically low in total carbohydrate, so always read the nutrition label.
Some products are sweetened with ingredients that may affect blood glucose differently from others.
For a lower-carbohydrate result, calculate the nutrition information using the exact ingredients and quantities you use.
If you are following a ketogenic diet for a medical reason, discuss your individual carbohydrate and sweetener choices with an appropriate healthcare professional.
Recipe Summary
This Keto Musketeer Candy combines a soft chocolate center with a smooth chocolate coating.
The recipe begins with a creamy cocoa mixture made from heavy cream, butter, cocoa powder, keto-friendly sweetener, vanilla, and salt.
Bloomed gelatin is added to help the center hold its shape.
The mixture is then beaten to introduce a lighter texture before being spread into a parchment-lined pan and chilled.
Once firm, the center is cut into individual pieces.
Each piece is dipped in melted sugar-free chocolate blended with a small amount of coconut oil.
The finished candy is chilled until the coating becomes firm.
The result is a rich homemade chocolate treat with a soft center and a satisfying chocolate shell.
Keto Musketeer Candy Recipe Card
Yield: Approximately 16 small pieces
Preparation time: 25 minutes
Chilling time: 2 1/2 to 4 hours
Chocolate coating time: 20 minutes
Total time: Approximately 3 to 5 hours
Ingredients:
1/2 cup heavy whipping cream
2 tablespoons unsalted butter
1/3 cup powdered allulose
2 tablespoons unsweetened cocoa powder
1 teaspoon vanilla extract
1/4 teaspoon salt
1 teaspoon unflavored gelatin
2 tablespoons cold water
8 ounces sugar-free dark chocolate
2 tablespoons coconut oil
1/2 teaspoon vanilla extract
Instructions:
Line an 8-inch square pan with parchment paper and lightly grease it.
Bloom the gelatin in cold water for five minutes.
Warm the heavy cream, butter, and powdered sweetener in a saucepan over low heat.
Whisk in the cocoa powder until smooth.
Remove from the heat and stir in vanilla and salt.
Add the bloomed gelatin and stir until completely dissolved.
Allow the mixture to cool slightly.
Beat the chocolate mixture until lighter and creamy.
Spread it evenly into the prepared pan.
Refrigerate for two to four hours, or until firm.
Remove the center from the pan and cut it into small bars or squares.
Melt the sugar-free chocolate with coconut oil.
Stir in the vanilla.
Dip each candy piece into the melted chocolate.
Place the coated pieces on parchment paper.
Refrigerate for 30 to 45 minutes, until the chocolate is firm.
Store the finished candy in an airtight container in the refrigerator.
Final Tips
For the best homemade Keto Musketeer Candy, take your time with each stage.
The center needs to be properly chilled before cutting.
The chocolate should be melted gently rather than overheated.
A powdered sweetener gives the smoothest result.
Small pieces are ideal because the candy is rich and satisfying.
For the most classic chocolate-bar experience, allow the finished candy to sit at room temperature for several minutes before eating. This softens the center slightly while keeping the chocolate coating pleasantly firm.
Once you have mastered the basic recipe, experiment with peanut butter, almond butter, espresso, coconut, mint, or chopped nuts to create your own favorite variation.
This homemade candy is especially useful when you want something chocolatey and indulgent without making a full dessert. Keeping a small container of these pieces in the refrigerator means you can enjoy a controlled portion whenever a chocolate craving appears.

